Blog

Santorini, Greece

Last June we took our first trip to Greece and we loved it. This post will detail our first stop in Greece to the island of Santorini. Follow up posts will outline our other stops on the trip. This includes the Cycladic Islands (Santorini, Milos and Naxos), Athens, and the Ionian Island of Corfu.

These posts are by no means meant to be a comprehensive guide to Greece. There are tons of ways to take a trip here and many towns, islands and places to visit. I was a bit overwhelmed in my planning to choose the *best* route. However, there is no real *best* route. How you visit Greece should be what works best for you. Our trip just barely scratched the surface of what you can see and do. Take this as one example of a trip and feel free to use it to build your *best* trip there in the future.

Santorini
Santorini sunsets.

Island Basics

Santorini

Santorini, or Thíra as it is known, is in the Cycladic Island group. In fact, it is actually a group of islands, which include Thíra, Thirassiá, Asproníssi, Palea and Nea Kaméni. Santorini is a rather small island at just about 76 square kilometers or roughly the size of Manhattan. The crescent shaped island is 16km in length and 1km to 5km in width. It is located in the Aegean Sea, about 200km southeast of Athens. The island is considered to be an active volcano, but is not currently at risk of erupting.

Santorini has a population of about 15,000 people, but it swells with visitors during the summer months. Peak travel time is June through September and you can expect crowded hot spots and traffic filled island roads. You can avoid most of that by visiting in shoulder season from October to November or March to May.

Oia views
View from Oia, Santorini.

Is Santorini Worth the Crowds?

I am somewhat conflicted when it comes to Santorini and how I would recommend it (or not). On one hand it is super touristy. Like tacky touristy in the overwhelming nature of the crowds, souvenirs and selfie sticks. We visited the island in June, which is high tourist season. After our trip, I would recommend you avoid Santorini during that time. Not only is it hot in June, but there are tons of people and getting around can be challenging.

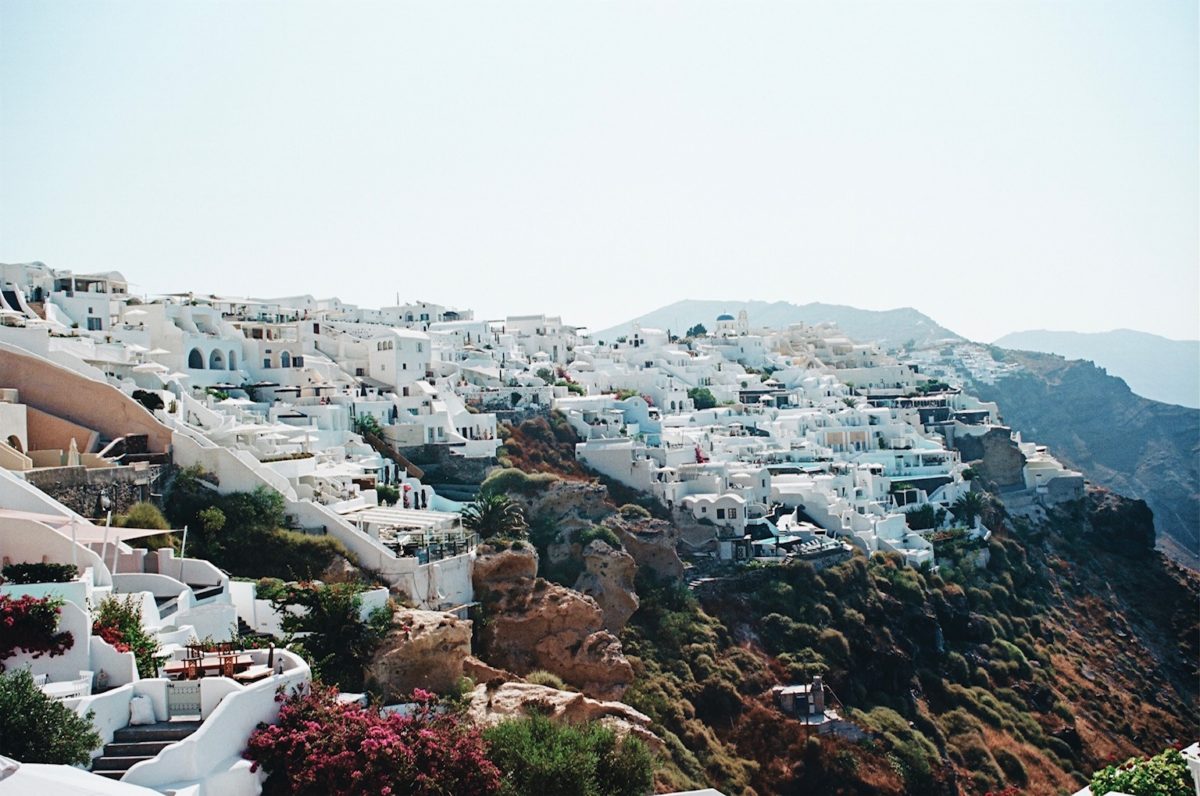
However, it is also a very majestic island that is worth a visit. The cascading cliffs and the coastline views from the caldera side of the island are stunning. If you visit in shoulder season, you will likely have lighter crowds and cooler temperatures. When you do go, marvel at the beauty of the gleaming blue sea. Puzzle at the layout of white stucco houses down the cliffside, one built into the next. Take in the red sand of the volcanic Red Beach. Explore the alleyways filled with shops and restaurants and bakeries. And stand in awe of the glowing orange sunsets from a perch in Oia.

Santorini sunsets
Checking out that famed Oia sunset.

Trip Planning: Before

I did a lot of research before visiting Greece. The hardest part was narrowing down where to go and what to do for our two week itinerary. It can be overwhelming to narrow down all of the information since there are so many good options. Even after a trip there under my wings, I still haven’t seen the tip of it. I hope to return to Greece someday to grasp more of the beauty and magic of the country.

Santorini

It is advisable to travel to Greece, and Santorini, with a plan. Santorini is one of the biggest tourist destinations in Europe, so knowing where you will stay ahead of time will save you a lot of stress. Since the island is small, there are limited lodging options. If you are looking to stay in hot ticket places with views of the caldera, book ahead. Also, if you plan to rent a car, you might want to do that beforehand as well.

I got a ton of help planning my itinerary from various travel blogs. Santorini Dave has all types of lists and maps of the island. You can also check out Lonely Planet, Hand Luggage Only and Nomadic Matt for some trip guidance.

Santorini Alleyways

Getting There

There are no direct flights to Santorini from the US, Canada or Australia. Most often you will have to fly through Europe to get there. We took a flight from Amsterdam to Santorini on the budget airline Transavia. Our flight only took 3 hours and it was an easy experience. Do some quick searching on places like Kayak to find an affordable flight that fits your needs.

You can also get to Santorini via ferry from many of the nearby islands or from Athens. We took a ferry when we left for our next stop of Milos and the journey wasn’t too bad.

Santorini

Santorini: Things to know

The first thing you will notice about Santorini in summer is the heat. We had read the weather reports, but did not expect the heat to hit us as hard as it did. It cools down a bit in the evenings and mornings, but once the sun comes out in full force, the heat can be intense. I suggest looking for a place with an AC and avoiding walking around mid-day.

Also, we rented a car to get around the island. I would recommend you figure out what types of activities you plan to do to factor in if you need to rent. For example, on our first day we walked down to Amoudi Bay and barely drove and the second day we did a boat tour so we didn’t need a car. Ultimately, we may not have needed a car for our four day visit.

Food options and restaurants are aplenty on Santorini. We asked our Airbnb host for advice, which is a good place to start for recommendations. Many of the cliffside restaurants, especially those with views of the sunset, can be expensive. We skipped those places and chose family style and casual spots off the main strip in Oia. We returned to Pitogyros many times for the yummy and low cost gyros. Many of the travel blogs have extensive lists of restaurant recommendations.

Santorini
Miguel modeling on the steps outside our Airbnb.

Where to Stay

We stayed at a beautiful Airbnb located in Oia with a great cliffside view of the sea. The place was a typical cave house, like many that dot the cliffs of Santorini. Due to the material and structure of these cave houses, they are able to retain heat in winter and cooler temperatures during summer months. This lodging was our big splurge of the trip, but we loved staying here for all the amenities it had to offer, including the unbeatable views.

Santorini Airbnb

We had a kitchen for making a few basic meals, a patio and an AC in our bedroom. Like many places on the island, there were a lot of steps to get there, but it was very manageable.

If you plan to visit Santorini during summer months, I would recommend staying in one of the less touristy towns. While I enjoyed Oia, I felt that it was overwhelming because of all of the tourists who flocked there.

If you can, it is worth it to splurge on a place on the caldera side. This is more affordable in shoulder season. If you are looking for a lower budget option, there are many nice places inland, as well as on the other side of the island near the beaches.

What to Do

Amoudi Bay
Donkeys headed down the steep stairs to Amoudi Bay.

Amoudi Bay

Amoudi Bay

After arriving from the airport, we set down our things and headed to Amoudi Bay. It is a short, but steep hike from Oia, with a total of 300 steps down from the trailhead. As you hike down, you will likely be walking alongside donkeys, who are used to carry people and supplies to and from the bay. We opted to walk down, which was hot and sweaty, but not bad.

Upon reaching the bay, you will see that it is surrounded by deep red cliffs, contrasted by the glistening dark turquoise water and white buildings. There is a small slab of concrete and rock that you can jump off to take a swim. We did that immediately. Aside from that, the bay is fairly small. It is dotted with a few lodging options and a series of similarly overpriced seafood restaurants. We ate at one called Sunset Amoudi and it was quite good. Mainly, we enjoyed relaxing in the breeze amid all the beauty of the bay.

Amoudi Bay
Miguel enjoying the waters of Amoudi Bay.

Santorini Boat Tours

We did a sailing trip with Sunset Oia Santorini Sailing our first full day there. They offer a range of sailing trips that visit the famed coves, beaches and nearby islands. We did a half day Santorini Gems tour, which was on a catamaran with a small group size. It allowed us to visit places we wouldn’t have been able to reach in our car.

We got picked up in the late morning and bused to the Amoudi Bay port. The tour visited a few different spots on the island, including the hot springs, White Beach and Red Beach. After arriving at each location, we were allowed to get out and swim. Around noon, the guides made us a delicious lunch. Overall it was a fun experience. While we didn’t get to walk on the beaches, we saw a bunch of nice spots from the water. I would recommend taking a boat trip as a great way to see another side of the island.

Santorini boat tours
Boat tours are very common on Santorini.

Perissa Beach

Perissa Beach
Views on Perissa beach.

We spent our next full day at Perissa Beach on the other side of the island from Oia. This beach was easy to get to and parking wasn’t too bad. On the beach, there were tons of restaurants that offered umbrellas and beach chairs for a daily fee. Some were free if you ordered a certain amount of food or drinks at the restaurant. I definitely enjoyed staying out of the sun and relaxing under an umbrella.

Perissa beach, along with it’s neighbor Perivolos, are peaceful black sand beaches with lots of food and drink options. The beach felt less crowded than other parts of the island, which was very welcomed. You can learn more here about other Santorini beaches. I will add though, that in comparison to the beaches we found on Milos and Corfu, Santorini beaches don’t even compare. In short, don’t come to Santorini for the beaches!
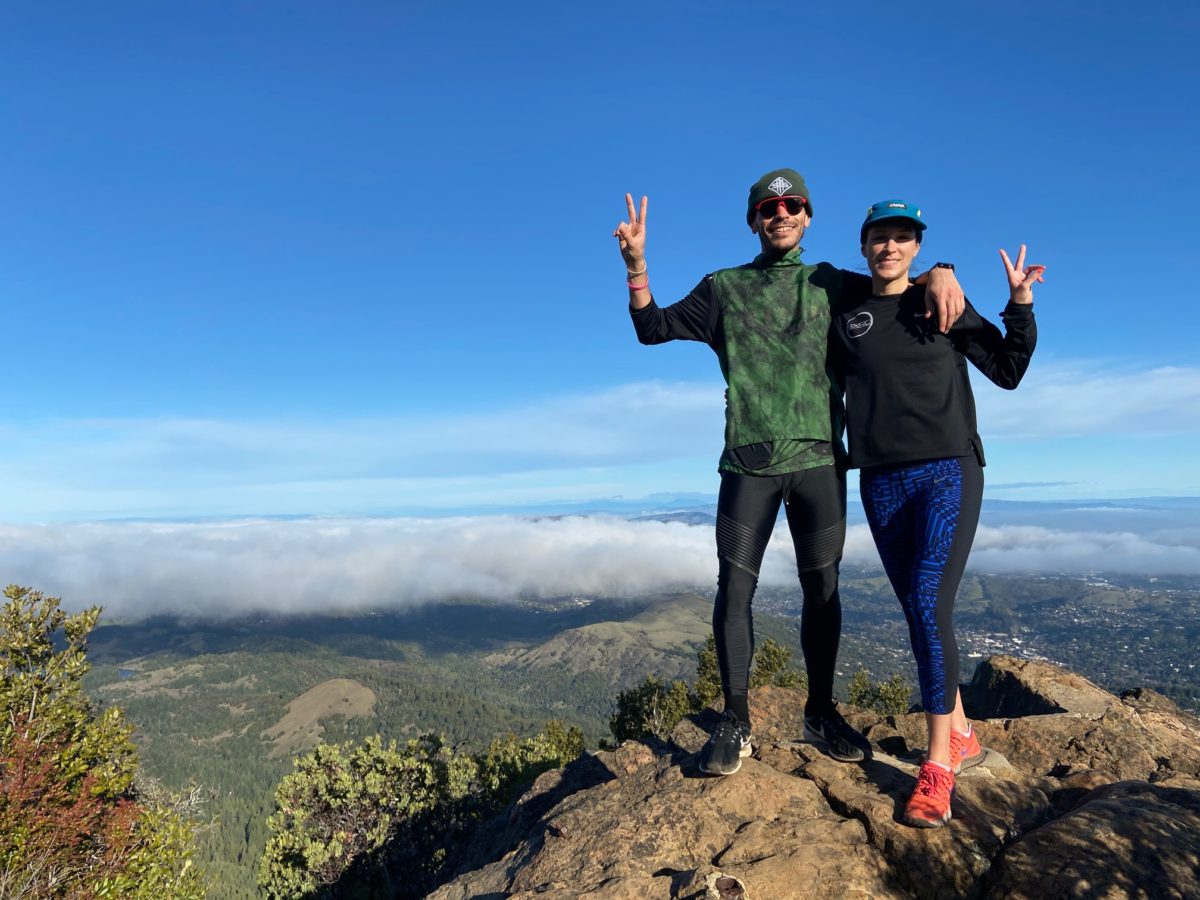
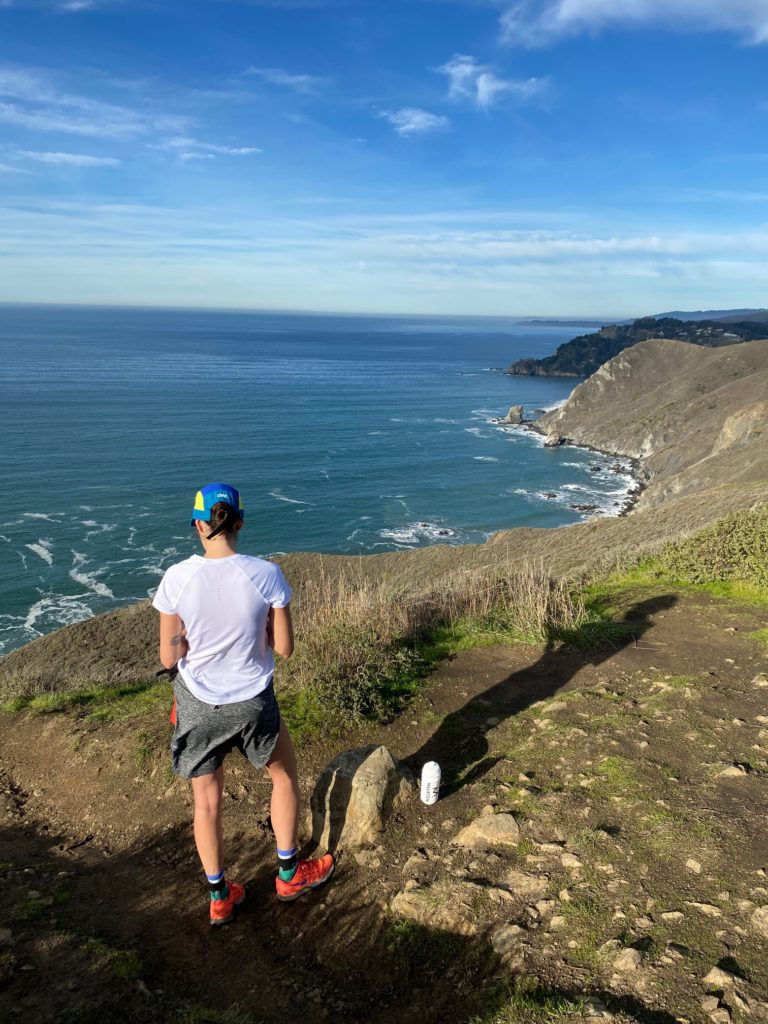
The Running Scene

Fira-Oia Trail
Views from Fira-Oia trail looking at Oia in the distance.

Santorini can be a bit challenging when it comes to getting runs in. The benefit was that there was a fairly accessible local trail that started near our Airbnb. Outside of that, the small island roads and the traffic make going on runs and staying safe somewhat difficult.

For this reason, I stuck to the nearby Fira-Oia trail. This is a 10.5km point to point hiking trail between the two towns. The trail is a bit technical and has a good amount of elevation gain. On the upside, it is safely away from cars and held amazing coastal views. I saw a bunch of hikers on my runs and I was excited to see a few fellow trail runners. Since it gets really hot in summer, I recommend you get your run in early and bring water with you.

Fira-Oia trail
Running on the Fira-Oia trail.
Fira-Oia trail
A Strava view of my trail run.

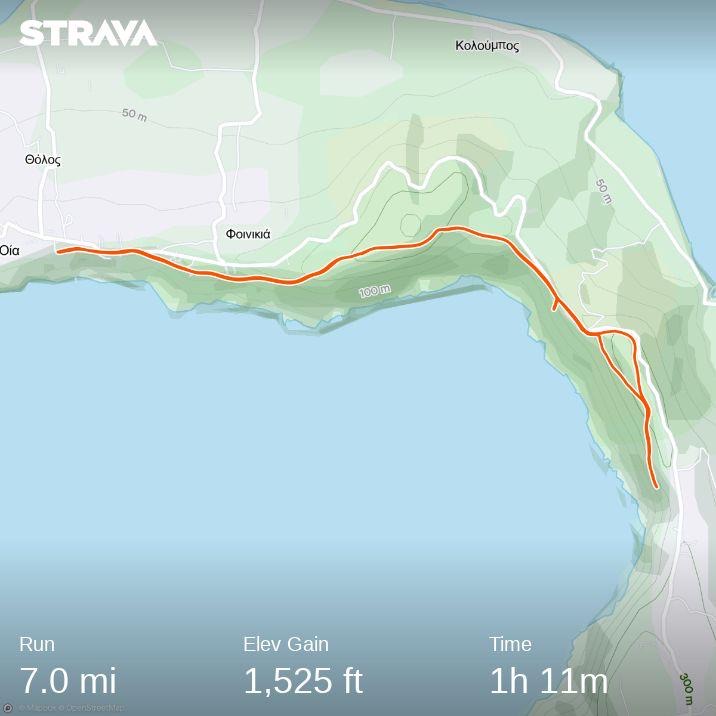
If you are staying on other parts of the island, you might be able to get a good run in along the beach or on a more remote road. Since we were based in Oia, it felt safest to stick to the trails.

Reading on Santorini

Atlantis Books Santorini

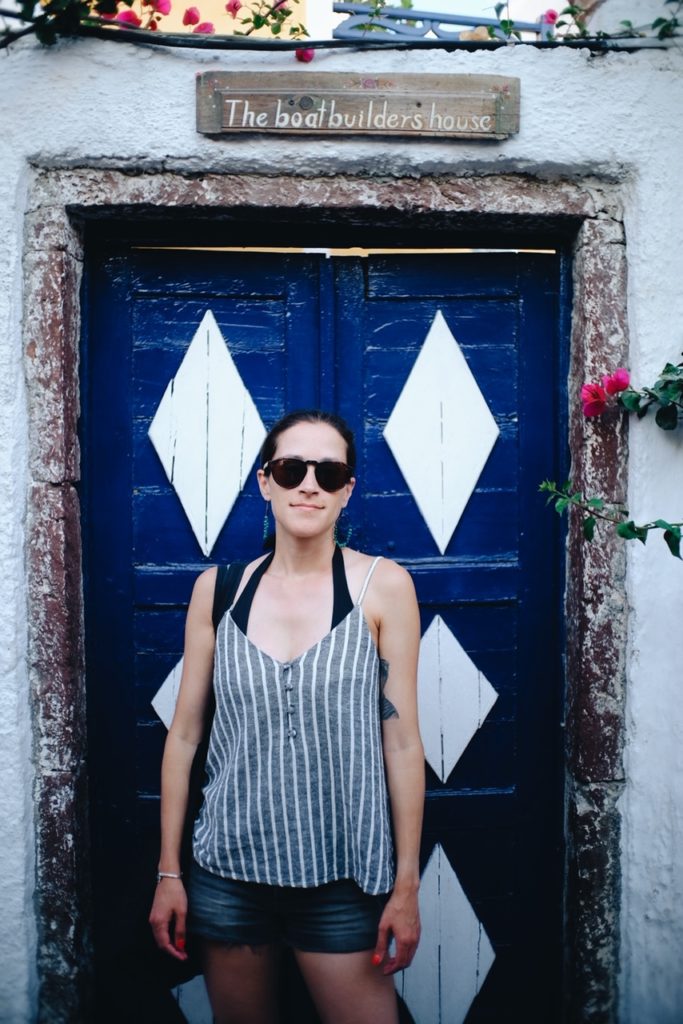
If you are into books and small bookstores, I highly recommend visiting Atlantis Books while you are in Santorini. It is located right on the main pedestrian path in Oia and easy to find. They offer a wide range of books in different languages. There are books literally stacked up to the ceilings inside the bookstore. For me, this was like a dream!

Atlantis Books Santorini
Enjoying all the reading wonder in Atlantis Books.

Getting Away: Next Stop Milos

From Santorini we took a ferry to the island of Milos. I looked up the ferry schedules ahead of time using the Greek Ferries website. I then booked directly with SeaJets. If you pre-ordered your tickets, you can pay a small fee to print out your tickets at the ferry terminal. You can also wing it and book when you arrive. If you rent a car, you will have to return your rental at the airport and then take a taxi to the ferry port.

Santorini
Santorini dreaming.

Fire Island National Seashore

Last summer we took a short camping trip to the Fire Island National Seashore. The island is fairly easy to access from NYC and it makes for a nice weekend escape. It is filled with diverse animal and plant life, and we had some great views from our campsite. It was all very idyllic until you added in the mosquitoes. There were a LOT of mosquitoes that we had to contend with and it made the camping slightly less than pleasurable. Either way, it is a beautiful island to visit and worth a quick trip.

The National Park Service established the Fire Island National Seashore in 1964. The park covers 26 miles of the 32 mile long island. There are also 17 commercial communities on the island, one of which is Davis Park, within walking distance to the campground. The protected area of 19,579 acres holds bay islands, sand flats and wetlands.

Trip Planning: Before

Ferry
View from the Watch Hill Ferry to Fire Island.

Since the island is so popular, it is important to book your accommodation early. If you plan to camp, you’ll want to make a reservation at LoveFins. LoveFins has both camping and glamping options. The National Park Service also offers backcountry camping, which you will need an overnight permit for.

Aside from those options, you can also stay at a rented house in other parts of the island outside of the protected area.

Getting to Fire Island

There are a number of ways that you can get to Fire Island. We took the Long Island Railroad from Penn Station to the Patchogue Station. From there you can take a few block walk over to the Patchogue-Watch Hill Ferry, which is operated by the National Park Service. The ferry leaves regularly in summer months, but you should check the schedule before heading out. If you drive, there are parking spots available at the ferry terminal. You can also access the Davis Park Ferry nearby, which will require you to walk about 1 mile from the ferry dock to the campground.

Watch Hill
Entering the Watch Hill Marina on the ferry.

After exiting the ferry on Fire Island, you will see wetlands and sand dunes spreading out before you. There is no fee to enter the national seashore and you will only need to pay for your camping fees. Please note that there are no paved roads within Fire Island National Seashore. This means once you get off the ferry, anywhere you visit will be by foot. During our stay we explored the wetland area on our run, but we mainly stayed close to the campsite and the beach.

Fire Island Boardwalks
Walking the boardwalks of Fire Island.

Camping On Fire Island

During our stay we camped at Watch Hill Campground, which is part of the Fire Island National Seashore. The campground is only a quarter mile from the ferry marina, making it easily accessible by foot. LovFins, an authorized concessioner of the National Park Service, runs the campground, glamping and the marina. In total the campground has 23 campsites, 1 group site and 4 platform furnished tent glamping options. Check in was easy and we were able to go directly to our site.

For camping on the island, you’ll need a rain fly in case you get rain during your stay (we did). And since the sites are on soft sand, you’ll need long metal stakes for the tent. The weather can be a bit variable with cooler nights and hot days in summer. I’d recommend bringing both warm and cool weather clothing, as well as adequate mosquito repellant.

The campground is located close to the marina, so there are a decent amount of amenities nearby, albeit overpriced. There is a restaurant, bar and small convenience store. I recommend bringing food and gear with you instead of purchasing when you are on the island.

Camping
Our campsite on sand behind the dunes.

Animal Friends & Mosquitoes!

We saw quite a few animals while we were camping, such as lots of little bunnies in the tall grass beyond our campsite. They were skittish, but ever-present in the dunes nearby. Additionally, there were a number of deer seemingly unbothered by humans, which was a bit worrisome. One deer even sprawled out in various campsites and wandered around looking for food. This is definitely not ideal animal behavior, as it shows the dependency of the animals on humans as a food source.

One huge challenge we had while camping were the mosquitoes. Since the campground is located near the swampy wetlands, there are so many mosquitoes around. Yikes! It was especially bad in the mornings and evenings. Whenever we left our tent we were instantly swarmed by mosquitoes that landed on any area that was not covered in repellant or clothing.

This made our camping experience a bit less than ideal. We sprayed ourselves, but we weren’t prepared for such aggressive mosquitoes. In fact, the park service recommends visiting in spring or fall to avoid large amounts of mosquitoes or ticks. If you do go in summer, make sure to pack accordingly with light long sleeves, repellent and citronella.

Getting a Run in (with no roads available)

Running
Miguel getting a hot, humid run in along the boardwalks of Fire Island.

Fire Island has no roads in the section of the island where we were staying. Everything is either soft sand trails or narrow wooden boardwalks. While this makes going on a run difficult, we found a way to get a run in and be creative. We did loops on the boardwalks and ran over to the nearby Davis Park community. Thankfully the wetlands area was fairly empty in the morning and it allowed us space for the run. One benefit of the run was that the mosquitoes didn’t bother us. See the Strava outline of our run below.

Beach Time at the Fire Island Seashore

Fire Island
Fire Island Seashore.

After finishing our run, we headed to the beach for some relaxation. The beach was just over the dune from where our campsite was, so it was an easy walk away. The beach had soft sand and grassy covered dunes as far as the eye could see. A plus was that there weren’t too many people there and we got to enjoy our books on the beach. And thankfully there weren’t any mosquitoes in the beach area.

Fire Island
Miguel enjoying the Fire Island Seashore.

All in all, it was a solid trip to Fire Island. While it was tough to camp with so many mosquitoes, I still enjoyed the views and seeing the island. I imagine it would be a great trip to take in the spring or fall when there are less mosquitoes. I hope to someday return, maybe next time in a rented house.

Check out some of my other travel and camping experiences on my destinations page. And if you are interested in running, check out my travel running page.

Grand Canyon National Park

In August, we took a trip to the Grand Canyon National Park. We drove out from Albuquerque, New Mexico with my cousins and enjoyed the desert views along the way. This was not my first trip to the Grand Canyon, but I was reminded (again) just how magnificent it is. Everyone should try to go at least once.

Located in Arizona, the Grand Canyon is a mile deep canyon over the Colorado River with an average width of ten miles across. It is an extremely popular (read: touristy) location, with visitors from all over the world. In fact, the Grand Canyon was the second most visited national park in 2019, with almost 6 million visitors. Over 90% of visitors head to the South Rim of the canyon, which has more options for lodging and amenities. The South Rim averages about 7,000 feet elevation above sea level.

Grand Canyon National Park
View from the Desert View Watchtower in the Grand Canyon National Park.

TRIP PLANNING: BEFORE

I started looking into this trip about nine months out as I knew that the Grand Canyon is a highly visited national park. In the beginning I researched how we would best get there and where we would stay. I coordinated to go with my cousins from New Mexico and looked up campgrounds within the park. I booked my campsite in March for our late August trip. Due to the park’s popularity and high volume of visitors, it is essential to book your reservation ahead of time.

I decided on Mather Campground because it is on the South Rim of the park and close to many amenities. If you’re not into camping, there are a number of beautiful lodges within the park as well. You also have the option of staying outside the park, but you will have to contend with daily traffic to enter the park.

For transportation, I figured out that I would be driving in with my family from Albuquerque. You can also fly in to nearby airports and drive, such as Flagstaff (1+ hour), Phoenix (3-4hr) or Las Vegas (4-5hr).

Roadtrip: ABQ to Grand Canyon

Us in the picnic area of the Hubbell Trading Post.

We left Albuquerque in the morning and made our first stop at the Hubbell Trading Post to break up the 6+ hour drive. The Hubbell Trading Post is a national historic site in Ganado, Arizona that has been operating as a trading post of Native American art since 1878 and run by the National Park Service since 1967. After eating a picnic lunch there, we explored the grounds and museum collection. Then we got back on the road again.

Hubbell Trading Post, Ganado, Arizona.

Entering the Park

We entered the park from the southeast, passing through the nearby Hopi Reservation on smaller highways. As we gained elevation, we drove through the Kaibab National Forest, lush with ponderosa pine, fir and spruce trees. We drove through the forest for a while until we entered the park.

At the entrance, I bought the America the Beautiful pass. This pass grants me access to more than 2,000 federal recreation sites for a year. I got it knowing that I would be headed to more national parks on my California trip in December. You can also pay a one-time entrance fee. More basic information about the park can be found here.

Desert View Watchtower

Grand Canyon
Desert View Watchtower in the South Rim of the park.

After entering the park, we made our first stop at the Desert View Watchtower in the South Rim. The Watchtower was designed in 1932 by Mary Colter in the style of Ancestral Puebloan towers. There is an amazing viewpoint out towards the canyon from here, which gave us our first glimpse of the gigantic canyon and it’s sweeping beauty. The tower itself is quite impressive and you can climb all the way up to the top in a series of spiraling stairs.

Camping in the Grand Canyon

Grand Canyon Camping at Mather Campground.

We camped in Mather Campground inside the park, which is on the South Rim and open year round. You can make reservations for the campsite up to 6 months in advance at Recreation.gov. The campground is in a great location and it has lots of trails around for short walks and hikes directly from the site. If you need to re-up on any groceries or supplies, the Grand Canyon Village is a short drive away.

Even though we were there in summer, the high elevation and desert environment made for quite chilly nights and mornings. Make sure to pack accordingly for both the heat and the cool evening temps. At night, you have amazing views of the bright stars and sky, being so far away from city light pollution.

Running in the Grand Canyon

Grand Canyon
Running along the Rim Trail.

As I mentioned, the South Rim sits at around 7,000 feet elevation, which is definitely something to be considered for any hike or run you do here. We did a long run on our first morning along the Rim Trail that traces the canyon’s edge. We started early to beat the heat and avoid the large crowds. Luckily, we could leave directly from our campsite on a smaller trail that linked up to the Rim Trail. The route consisted of a winding, paved trail with occasional water fountains and bathrooms.

It was definitely tough to run at elevation, and more difficult when combined with the heat in the latter part of the run, but we persevered. Either way, getting the opportunity to run along the canyon was easily one of the most epic runs I have ever done. Just taking in the panoramic views into the vast expanse of the canyon was something I’m not sure I’ll be able to top.

Our Rim Trail run.

Hiking in the Grand Canyon

Views from the Rim Trail, with the brown Colorado River in the distance.

After our run along the Rim Trail, we set out on the free shuttle that stops at various locations around the park. We got off at Hermits Rest, the farthest western stop on the South Rim. We did a slow, easy hike from there to Pima Point and then hopped back on the shuttle. It was stunning to observe the sprawling canyon as we walked. Afterwards we met up with my cousins at the El Tovar Lodge for some ice cream and drinks. This is a nice place to chill after a hike.

There are tons of hiking options in the Grand Canyon, with most of the easier ones above the rim. For steeper and harder hikes you can venture down into the canyon, but you must be well prepared for those hikes. You can access many of the trailheads using the free shuttle bus that runs from sunrise to sunset. For the more adventurous, you can look into a backcountry permit to hike and camp down in the canyon. This gets booked up fast though, so you’ll want to start planning 9-12 months out.

My cousin Alex looking out on the South Kaibab Trail.

South Kaibab Trail

South Kaibab Trail hike.

On our second day we did an early morning hike on the South Kaibab Trail. We took the early morning Hikers’ Express Shuttle from the visitor center to the trailhead, which starts running earlier than the main shuttles. The goal is to start your hike before sunrise or just after to spend as much time as possible hiking in cooler weather. Since we were there in late August/early September, the days got very hot and we wanted to avoid the heat as much as we could.

It was cold when we started and we wore our long sleeves, but ended up completely stripping down to our t-shirts as the sun came out. We made sure to pack tons of water since there aren’t any water spots along the trail. We also wore hats, breathable clothing and sunscreen to protect ourselves from the sun.

Grand Canyon
Great views along the South Kaibab Trail.

Since we were doing a day hike, we went down about a mile and half to the second rest area called Cedar Point. It is not advised to go beyond this point if you are doing a day hike in summer due to the heat and potential for dehydration.

Grand Canyon
Miguel and Alex photographing the views at Cedar Point before we began our return.

Planning Ahead When Hiking

Grand Canyon
My cousin Alex and I hiking down the South Kaibab Trail.

It is crucial to plan ahead when hiking in the Grand Canyon. Due to the elevation, heat and exposed canyon trails, you will need to pack tons of water, as there is often only water available at the trailheads. Aside from water, pack snacks and weather appropriate clothing. The park promotes Hiking Smart, with the following guidelines:

  • Plan your hike before you start.
  • Balance your food and water intake.
  • Eat salty snacks and drink water or sports drinks.
  • Go slowly, rest often, stay cool. Allow the weakest hiker to set the pace.
  • During the summer, hike during the cooler, shadier times of the day.
Grand Canyon
South Kaibab Trail.

Running California Style

Running the trails and paths of California

I use the sport of running as a means to explore when I travel. I can get places faster and check out a destination in a different way by running ‘behind the scenes.’ On our trip to California in December, we ran some trails, roads and a tiny bit of track. Everywhere we ran had its own special magic. We got to do runs in the LA area, Yosemite and north of San Francisco. This post will highlight the best runs from our trip. You can link to the full rundown of my trip to learn more about our California adventure.

Prior to arriving at each of our destinations, I looked up potential running routes and hikes in the area. You can do this directly on the park sites or just by googling the area. I also look on All Trails and use my Strava or Footpath apps to plan out nearby routes.

Exploring the foothills

California running
Miguel running on the Thompson Creek Trail.
running track
Getting some track work in at Pomona College.

While we were staying in the LA area, we went on a few runs and did one track workout. For our longer runs, we ran on the dirt trails of the Claremont Wilderness Park at the base of the San Gabriel Mountains and the Angeles National Forest. The park has some great trails that are popular for hiking, mountain biking and trail running. That includes the Thompson Creek Trail, a nice biking and running path along the foothills. We also headed to Pomona College to do a brutal 5 mile tempo workout on the track.

running California foothills
Running in the foothills of the San Gabriel Mountains.

Checking out the yosemite Trails

Once our trip took us up north, we moved primarily to trails. At Yosemite National Park, our time was limited, so we ended up doing our runs on hiking trails in the park. Our first run was on the Mirror Lake Trail, which offered an enchanting setting around a lake and allowed us to leave from our doorstep in the Curry Village.

Trail running
Mirror Lake Trail out and back run from Curry Village.

Yosemite trail running

On our second day, I ran solo around the valley on the Valley Loop Trail. This trail was mostly paved, with parts of the run in more remote areas of the valley. I was petrified the entire time that I would come across a bear running alone, but thankfully that did not happen! Even still, it was a great way to check out the valley in the early, misty morning when most people were still sleeping. In fact, while we were there, we didn’t see any larger animals on any of our runs.

Trail running
Yosemite valley loop trail solo run.

On our last morning, we took a run around the Lower Yosemite Fall Trail. We got out early before the tour buses and crowds started piling up at the falls. You can see in the photos above that we were completely alone. Such a treat in this often crowded park! It felt special to have the place all to ourselves with the valley dew in the air.

Running in Golden Gate Recreation Area

The next part of our trip took us to the Bay Area. We chose to stay north of the city to be closer to nature. And since we were very close Golden Gate National Recreation Area, we could leave from our doorstep to the trails nearby. The vast network of trails and fire roads in this area gives you tons of running options. For our first run there, we mixed it up and ran a few different interconnected trails with spectacular views of the ocean and coast. And since we were largely on fire roads, the terrain wasn’t too technical.

Trail running
Running the trails of Golden Gate National Recreation Area.

On our second day in the area, we got lucky to be invited by a friend to a group run up Mt. Tamalpais. Mt Tam has a stunning 2,571 foot peak with a panorama view of the surrounding hills, valleys and ocean. The out and back peak run was hard as hell, but worth every bit of the toughness.

Tamalpais running
Mount Tamalpais out and back trail run to the peak.
Mt Tamalpais Running
View from the peak of Mount Tamalpais.

Some running Resources

Check out my running page, which will link to all my running articles in one place. Stay tuned by signing up for the newsletter for future posts.

Mt Tamalpais Running
Miguel above it all on Mt. Tamalpais.

California Dreaming

Deserts, Mountains and beaches

For the holidays this year, Miguel and I took advantage of our time off and decided to take a trip to California. Instead of staying out east in the cold, we wanted to escape the city and see some national parks instead. Through this trip, we got to gain a greater appreciation for nature. Many of the places we visited were new for Miguel, which made it more exciting to me.

The plan for the first part of the trip was to fly into Los Angeles and use my mom’s house as a home base. From there, we would work our way north up to the Bay Area. Our trip by no means was long enough to see everything that I wanted us to see or do. But it allowed for some pretty spectacular sights in a short time.

This post will outline our trip to California in detail. More information about the running highlights from our trip can be found here.

California
Yosemite National Park morning views.

Trip Planning: before

I started planning for this trip about six months out. I began by doing general research for possible itineraries and places to visit. Once I found a route, I looked up potential flights, car rentals and lodging. Since I have family in California, I built this trip around staying with them when possible to lower costs. Obviously that is not always an option, but it worked out well for this trip.

My main logistical decision was if we would work our way north or south. I did some price checking and estimated what was the most cost effective. In the end I decided on going north. We would fly into the LA area and return from SFO. There are a lot of ways you can do a trip like this, so you should figure out your needs to do what is best for you.

Muir Woods California
Hiking around Muir Woods.

Booking transportation & Lodging

For flights, I use Kayak to search prices before I buy anything. Flights for this trip were more expensive because it was over the holidays. I monitored them for a while until I saw a price drop and then purchased them immediately. You can reduce the price by flying off peak times or by purchasing your ticket a few months out.

We would need to have our own car for a good chunk of this trip, but we were also flying in and out of different airports. I strategized the most cost effective way to do that. I ended up booking two rental cars, one for Southern California and one for the Bay Area. It is usually a lot cheaper to rent and return a car to the same location than a point to point rental.

For lodging, I looked up Airbnb first, as they have some good low cost options with kitchens. I also checked out Booking.com and other travel blogs to see if there were hotels, hostels or lodges that were recommended. For Yosemite, I searched directly through their lodge vendor since I wanted to stay inside the park while we were there.

Golden Gate California
Running the trails at Golden Gate National Recreation Area.

outline of an Adventure

I got to use my America the Beautiful parks pass a few times on this trip. The annual pass grants you access to more than 2,000 federal recreation sites across the US. After purchasing the pass in August, I wanted to maximize the pass as much as I could on this trip. In total, we went to 2 national parks, 1 national monument, and a national seashore on our California adventure. We visited:

Joshua Tree National Park

After spending a few days relaxing, we headed out to Joshua Tree National Park. The 800,000 acre park sits just 140 miles east of Los Angeles in Southern California. I hadn’t visited in years and I had forgotten just how magical Joshua Tree was. It is unlike anything you have ever seen and it will change how you feel about the desert. I highly recommend it to anyone.

Joshua Tree National Park is a place where the Mohave Desert and the Colorado Desert meet. It is filled with cacti, trees, shrubs, lizards and other desert dwelling plants, birds and animals. More information about the history and make-up of Joshua Tree can be found here and here. There is a fee to enter the park or you can use your America the Beautiful parks pass for covered entry.

We stayed both nights at an Airbnb in a fairly remote location. I probably wouldn’t choose that spot again. There are two small towns at the main entrances of the park, Joshua Tree and Twentynine Palms, where most of the lodging is located. I would recommend staying in the Joshua Tree area, as that was where most of the restaurants and amenities were. We ate at Pie for the People! and were surprised how much we loved it. You can also stay farther out, but it will make beating the crowds much harder. Additionally, there are campgrounds within the park that offer basic camping options.

Joshua Tree National Park
Joshua Tree National Park hiking on the Barker Dam Trail.

Joshua Tree Hiking and exploring

We had a little over two days to spend in Joshua Tree. We arrived late on the first day and got to see the sunset over the desert. The next day we woke up early to spend a full day at the park. I recommend arriving early if you are visiting during the peak winter season. There are limited parking spots at the popular trail heads and you will want to beat the crowds. It should also be noted that there are not many water facilities inside the park. It’s essential to prepare yourself by bringing lots of water, snacks and layers of clothing. When we visited in December, the temperatures were quite cold and we wore our jackets the entire time.

Joshua Tree National Park
Hidden Valley Nature Trail hike.

Joshua Tree is huge and there are lots of great hikes and places to visit for any type of activity level. While we weren’t able to do any trail runs in Joshua Tree, we loved hiking around. Since we wanted to see as much as possible, we did a series of short and easy hikes on our visit. We went to the following places based on various recommendations:

  • Hidden Valley Nature Trail: Easy, beautiful and short loop hike
  • Barker Dam Trail: Easy and relaxed hike with some cool views
  • Ryan Mountain Trail: Out and back hike that is moderately strenuous with spectacular views
  • Skull Rock Trail: Quick pitstop to this highly overrated IG hype location
  • Cholla Cactus Garden: Easy walk and one of my favorite areas (see below)

Next Step: driving from la to yosemite

Our drive home from Joshua Tree was kinda crazy because we hit a snowstorm in the high desert in our compact rental car. Yikes! And upon returning to the LA area, we took some down time to recover from getting a little sick. We made sure to stop for cookies one more time at Some Crust Bakery. The following day we dropped off our rental car since we would be hitching a ride north with my dad. He picked us up that evening before heading out the next day. His plan was to leave by 5am to avoid the LA traffic. Even though a 4am wake up call sounds rough, it is highly advised if you are leaving from Southern California.

Tejon Pass California
Crossing the Tejon Pass towards Yosemite.

The night before heading out we packed up our things and prepped lots of snacks for the 6-7 hour drive. My dad had done this drive many times before, so he was well prepared with snacks, rest stops and timing to avoid traffic. This was huge. We snuck out on the darkened LA freeways and we easily hit the Tejon Pass by dawn. As we climbed the pass, daylight started to creep in, exposing the snow covered hillsides along the highway. We had lucked out, the pass was just a few days out of being shut down completely from a snow storm. The car crested the ridge and we rode into the valley below as the storied California farmlands fanned out on both sides. This eventually made way to a mountainous forested area that meandered into the national park.

Yosemite National Park California
We made it! Entrance to Yosemite National Park.

yosemite national park

While we only got to spend three days and two nights in Yosemite National Park, I could have easily spent weeks there. The 1,200 square mile park is California’s most popular national park and there is no question why. It is truly mesmerizing and deserves at least one visit, but hopefully many. There is an entry fee to visit the park, or you can use your America the Beautiful parks pass for covered entry. Since we visited over the holidays, the place was slightly less crowded, but surprisingly still quite full. I can only imagine how crazy it gets during summer.

Mirror Lake, Yosemite National Park

For our visit to Yosemite, we opted to stay inside the park in their lodges. While a bit more pricey, it was very much worth it to be able to hike or run from your door. If you stay outside the park, you will have to queue up each day with a long line of cars for entry. Due to the popularity of the park, I recommend booking as early as you can to find a spot. We stayed our first night in a cabin in Curry Village and our second night at the Yosemite Valley Lodge. Both were beautiful in their own way, with Curry Village more rustic and Yosemite Valley Lodge a step up in decor and price. Those looking to splurge should check out Yosemite’s most famed lodge, the historic Ahwahnee.

Curry Village Yosemite
Our cabin in the Curry Village at Yosemite NP.

There is much to be said about Yosemite’s many trails that can’t all fit here. Most of the trails that ventured above the valley floor were closed due to icy winter conditions while we were there. Prior to heading to Yosemite, I recommend looking up some of their trails and hikes. There is a great transit system that drops off visitors at most trail heads throughout the park, making everything more accessible without a car.

Yosemite California
Us posing awkward at Yosemite Valley Falls.

Getting to the Bay Area from Yosemite

I did a lot of research prior to figure out how best to get from Yosemite to Northern California and there wasn’t a completely clear answer. What I ended up with was getting dropped off at the Merced train station and taking an Amtrak train north. There’s also a YARTS bus that can also take you from Yosemite to the train station. It’s a bit of a logistical challenge, and we did miss our train going north so we had to wait, but once we got on the train it was easy. We arrived in downtown San Francisco and hopped in a Lyft to pick up our rental car. From there we drove north of San Francisco to where we were staying for the next two nights.

Exploring Muir Woods National Monument

The following day we took an amazing morning trail run from our Airbnb and stopped by the yummy Shoreline Coffee Shop for some breakfast. Afterwards, we headed over to the Muir Woods National Monument. Muir Woods requires you purchase a parking permit prior to arrival. We booked our parking a few months out and the parking lot was packed when we arrived. When reserving, you chose a 30 minute arrival window and then pay the park fee separately to enter. You can also enter using your America the Beautiful pass.

Muir Woods is filled with old growth coastal redwoods that will enchant you. The area to hike within Muir Woods consists of mostly easy, well marked trails around the redwood giants. If you would like to go longer, there are options to break out to adjoining trails that offer a birds eye views of the area. Plan to bring some snacks and spend half a day hiking around and breathing in the fresh air.

Airbnb Mill Valley California
View of our Mill Valley airstream Airbnb.

We stayed at a funky Airbnb very close to the hills in Mill Valley. We loved the location and its close proximity to some cool trails and Muir Woods.

Muir Woods California
Hiking around Muir Woods.

Golden Gate National Recreation Area

We had some great runs in the Golden Gate National Recreation Area, which covers a 91 mile swath of coastline spanning out from the north side of the Golden Gate Bridge. I highlight the runs we did here. Access to the park is free and there is a vast trail network in this protected area. Check out my running page for more links to runs I’ve done in other places we’ve visited.

Views from the trails in Golden Gate National Recreation Area.

Point Reyes National Seashore

Our last stop on this whirlwind California trip was to the Point Reyes National Seashore. This was our last section of the trip and we had less than two days to check out this amazing location. Leaving Mill Valley, we drove up the scenic CA Route 1 panoramic highway, which offered us amazing views. We saw all types of beaches and coastal environments, misty forests and small towns along the way. We stopped in at Stinson Beach for a picnic lunch, which is my favorite beach in this area.

Stinson Beach California
Miguel chilling at Stinson Beach along CA Route 1.

We then drove directly into Point Reyes National Seashore, a large protected area in Northern California. Access to the park is free. We parked at Drakes Beach and got extremely lucky because it was elephant seal mating and pupping season. At the beach we saw quite a few elephant seals strewn out as if they were dead. There were volunteer docents to ensure visitors didn’t get too close to the seals while they were resting. Occasionally, the seals would lift up their heads and utter a long, low groan, and then lay their heads back down again. It was such a lovely experience.

After checking out the elephant seals, we took the shuttle up to visit the Point Reyes Lighthouse. We braced ourselves against the wind and climbed down the 313 steps to explore this lighthouse built in 1870.

There are a lot of options for lodging in the Point Reyes area. You can choose from tons of cute hotels, Airbnbs and camping. We stayed at the HI Point Reyes Hostel, which was very clean, had a great communal kitchen and some nice common areas. I picked it because it was one of the few places located inside Point Reyes, unlike other lodging in adjoining towns.

Point Reyes, California
Outdoor view of the HI Point Reyes Hostel.

The next morning we woke up early and visited the yummy Bovine Bakery in Point Reyes Station. Then we drove into San Francisco to the airport. We had such a great trip to California and we will definitely be back!

Point Reyes California
Point Reyes National Seashore.

trip Reading

Unlike my other travel adventures, I didn’t read as much on this trip. I’m not sure if it was due to being busy exploring nature, but I read much less. What I did read, though, I liked. My two books for this California trip were:

Taking it all in at Yosemite National Park.